Quick Answer
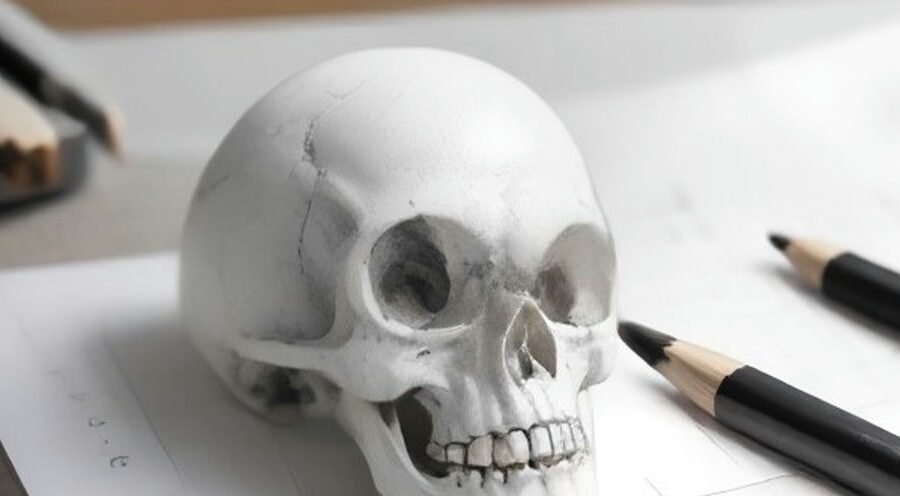
How to draw a skull easy step by step? Start with a large circle for the cranium and a vertical center line running through it. Add a horizontal eye line halfway down the whole skull, then sketch the jaw as a six-sided shape under the circle. Draw two big eye sockets on the eye line, an upside-down heart for the nose hole, and two rows of teeth between the gum lines. Finish by inking your best lines, erasing the guides, and shading the sockets, nose, and cheek hollows. The whole drawing takes about 30 to 40 minutes, and you only need a pencil, an eraser, and a sheet of paper.
Why Drawing a Skull Feels Hard (and Why It Is Not)
Skulls show up everywhere — on Halloween decorations, Day of the Dead altars, tattoo flash sheets, band posters, and pirate flags — yet most people freeze when they try to draw one. The finished shape looks simple, but the face part never seems to fit under the round top. The jaw ends up too long, the eyes sit too high, or the whole thing looks like a light bulb with teeth.
The problem is almost never talent. It is proportions. A skull is two shapes stacked together: a big round cranium on top and a smaller, squarer jaw underneath. Once you know where the eyes, nose, and teeth sit on those two shapes, the drawing almost builds itself. That is what this guide does. You will draw a skull from the front view in 15 small steps, and every step has one job only, so you can check your work before moving on.
Here is what you will finish with: a friendly front-view skull with deep eye sockets, a heart-shaped nose hole, two neat rows of teeth, cheekbones, and soft shading that makes the bone look round instead of flat. It is spooky enough for October and friendly enough for a kid’s sketchbook. The method works for complete beginners, for kids from about age seven, and for adults who want a realistic skull without an art degree.
How long does it take? About 30 to 40 minutes in total: roughly 20 minutes for the pencil steps, 5 minutes to ink and erase, and 10 to 15 minutes to shade and color. The teeth take the longest, so do not rush them.
How hard is it? Easy, if you follow the order. The steps are arranged so that each one only adds lines you can already place. You never have to guess where a feature goes, because every feature is tied to a guide line you drew earlier.
What You Need to Draw a Skull
You do not need expensive supplies. The whole drawing works with the pencil and paper most people already have at home. The table below lists the essentials first, then the nice-to-have extras that make shading easier.
| Item | What to use | Why it matters |
|---|---|---|
| Pencil | HB for sketching | Hard enough to draw light guide lines you can erase, soft enough to see |
| Pencil | 2B for outlines, 4B or 6B for shading | Softer pencils lay down darker lines and shadows without pressing hard |
| Eraser | A clean vinyl or plastic eraser | Removes guide lines without smearing the pencil |
| Eraser | A kneaded eraser (optional) | Lifts highlights gently and cleans smudges without tearing paper |
| Paper | Plain white paper, A4 or Letter, held upright | Smooth paper keeps lines clean; upright suits the skull’s tall shape |
| Ruler | Any straight edge | Keeps the center line and eye line truly straight |
| Fineliner | A black marker or fineliner, 0.5 mm | Inks the final lines so they stay crisp after erasing |
| Colors | Cream, beige, dark gray, orange, yellow, green pencils | Cream and beige make bone look warm; dark gray fills the hollows |
| Round object | A cup, lid, or compass (optional) | Traces a neat first circle if freehand circles wobble |
A note on pencils: draw every guide line lightly. Press so gently that the line is just visible. If you press hard at the start, the guides will not erase cleanly later, and your finished skull will carry faint ghost lines across the forehead. Light lines are free; heavy lines are permanent.
A note on paper: use paper with no lines and no texture. Lined notebook paper fights the drawing at every step, and rough watercolor paper makes smooth shading almost impossible for a beginner.
Skull Anatomy in 60 Seconds
You do not need a medical textbook to draw a skull, but knowing five facts about the real thing makes every step easier to understand. An adult human skull is made of 22 bones, joined by wavy seams called sutures. Eight of those bones form the cranium, the round case that protects the brain. Fourteen form the face, including the jaw. The lower jaw, called the mandible, is the only skull bone that can move — every other bone is locked in place.
| Part of the skull | What it is | Where it sits in your drawing |
|---|---|---|
| Cranium | The round dome of 8 bones that holds the brain | The big circle you draw first; more than half of the whole skull |
| Eye sockets (orbits) | Two deep, bowl-shaped hollows | On the eye line, one on each side of the center line |
| Nasal cavity | The hole where the nose was | On the center line, just below the eye sockets |
| Cheekbones (zygomatic bones) | The wide bones that give the face its width | The bulges on each side, level with the bottom of the eye sockets |
| Upper jaw (maxilla) | Holds the upper teeth | The flat gum line under the cheekbones |
| Lower jaw (mandible) | The only movable bone; holds the lower teeth | The six-sided shape under the circle, ending in the chin |
| Teeth | 32 in an adult: 16 upper, 16 lower | Two rows between the gum lines; the front view shows about 10 upper teeth |
| Sutures | Zigzag seams where the skull bones meet | Thin, wavy lines across the cranium, drawn last |
Two details from that table do most of the work in your drawing. First, the cranium takes up more than half of the whole skull — if your circle is small, the jaw will crowd everything below it. Second, the eye sockets sit near the middle of the whole skull, not in the middle of the circle. Beginners almost always place them too high, and that single mistake is what makes a skull look like a cartoon face instead of a skull.
The Proportions That Make a Skull Look Right
Before you draw a single feature, learn the three measurements that hold the whole skull together. Artists call this the thirds rule, and it comes from the Loomis method, the standard way of constructing a head. The face divides into three equal parts: from the jaw line to the nose line is one third, from the nose line to the brow line is one third, and from the brow line to the top of the forehead is one third. When those three bands are equal, the skull looks right even before any detail goes in.
| Measurement | Where it falls | How to check it |
|---|---|---|
| Cranium height | More than half of the whole skull | The circle’s diameter should be longer than the jaw below it |
| Eye line | Halfway down the whole skull, jaw included | Measure top of circle to chin, mark the middle |
| Brow line | One third down from the top of the forehead | Same as the top of the eye sockets |
| Nose line | Two thirds down the face | The bottom of the nose hole sits on this line |
| Jaw line | The bottom of the chin | One full circle-width below the top of the circle, roughly |
| Eye socket width | Each socket is about one eye-width apart | The gap between the sockets is roughly half a socket wide |
| Jaw width | Narrower than the cheekbones | If the jaw is as wide as the cranium, the skull looks like a helmet |
| Chin width | Narrower than the mouth | The chin is a short, flat edge, not a wide block |
The single most useful check in the whole guide is this: after you draw the eye line, fold your paper mentally in half along the center line. The left side and the right side should mirror each other. Skulls are symmetrical, and the eye notices a lopsided skull instantly. Check each side against the center line before you move to the next step, and you will never have to redraw the whole face.
How to Draw a Skull Easy Step by Step
Work through the steps in order and keep your lines light until Step 13, when you ink. Each step tells you what to draw, where it goes, and what to check before you continue. If a step looks wrong, erase only that step and try it again — never start the whole drawing over.
Step 1 — Draw a big circle and a center line. Place a large circle in the upper part of your page. This is the cranium, the round dome that holds the brain, and it takes up more than half of the whole skull. Then run a straight vertical line through the middle of the circle, from above the circle down to well below it. Every part of the face will be mirrored on that line, so make it truly vertical with a ruler. Tip: leave space under the circle. The jaw hangs down almost half a circle further, and beginners who start too low run out of paper at the chin.
Step 2 — Add the eye line and a jaw guide. Measure from the top of the circle to where the chin will be, and draw a level line halfway between them. That is the eye line, and it surprises most beginners because it sits so low — near the middle of the whole skull, not the middle of the circle. Under the circle, sketch a six-sided shape that is widest at the cheeks, narrows to two jaw corners, and ends in a short flat chin. Finish with a short level line across the lower face where the teeth will meet. Tip: if the eye line feels too low, trust it. Real eye sockets sit near the middle of the head, and raising them is the most common way to ruin a skull.
Step 3 — Outline the cranium and cheekbones. Trace the top of the circle in a firm line, then bring it down each side. Just above the eye line the outline dips inward a little — that is the temple. Below that it bumps out again for the cheekbones, then curves in toward the middle, where it ends in a flat bottom edge. That flat edge is the upper gum line, where the top teeth will hang. Tip: draw one side, then check the other side against the center line before you go on. Symmetry is easier to fix now than after the teeth are in.Step 4 — Draw the lower jaw with its corners. The jaw starts tucked under the cheekbones. Go straight down on each side, turn a rounded corner about level with the bottom of the lower teeth, and slope in toward a wide, slightly flat chin. Inside the jaw, draw the top edge as a straight line with short walls at each end, so it looks like an open box that will hold the lower teeth. Tip: keep the jaw narrower than the cheekbones. A jaw as wide as the cranium looks like a helmet, and a jaw wider than the cheekbones looks like a cartoon.
Step 5 — Add two deep eye sockets. On the eye line, draw two big rounded squares with soft corners. Tilt them so the outer corners sit a bit lower than the inner ones, which gives the skull a calm look instead of an angry one. Leave a gap between them roughly half a socket wide. The tops of the sockets sit on the brow line, and the bottoms sit halfway between the brow line and the nose line. Tip: make the sockets bigger than feels right. Small sockets turn the skull into a cartoon face, while big, dark sockets are what make a skull read as a skull from across the room.
Step 6 — Draw the upside-down heart nose. Below the sockets and on the center line, draw a heart flipped upside down. The point goes up, close to where the sockets end, and the two round lobes sit at the bottom, on the nose line. A living person has soft cartilage there, which is why a skull only shows a hole — the bone underneath forms this exact heart shape. Inside the heart, draw a thin vertical line up the middle: that is the vomer, the bone that splits the nasal cavity in two, with the small point at the bottom called the anterior nasal spine. Tip: start with the point at the top, then pull both sides down at the same time, one hand stroke each. A plain triangle here looks like a jack-o’-lantern, so round the bottom into two small lobes.
Step 7 — Fill in the upper row of teeth. Hang the top teeth from the gum line. Begin with the two front teeth on either side of the center line, then add three more on each side, each a little narrower than the one before. Round off the bottom corners and leave a thin gap between neighbors. You are drawing the eight front upper teeth that show in a front view; the molars at the back are hidden by the curve of the jaw. Tip: count the teeth out loud as you go. Four per side keeps the row even, and counting stops you from squeezing in a fifth tooth that has no room.
Step 8 — Add the lower row of teeth. These stand on the top edge of the jaw and reach up toward the bite line. Line each one up under a tooth from the upper row, with rounded tops this time. A small space between the two rows reads as a closed mouth. The lower teeth are slightly smaller than the upper teeth, and the front lower teeth sit a touch behind the upper row, because most people have a slight overbite. Tip: turn your paper upside down. The lower row then feels like drawing the upper row again, and the symmetry is much easier to judge.
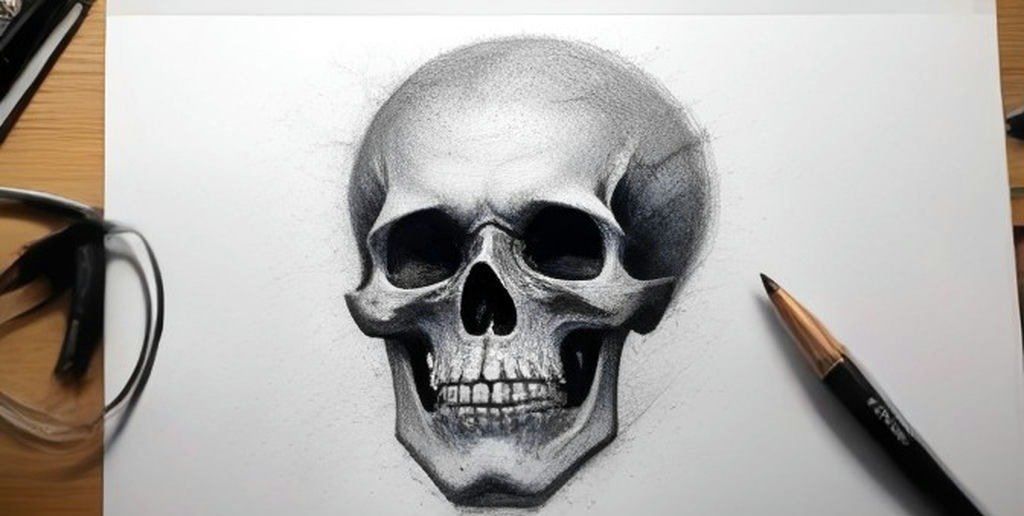
Step 9 — Add temples, cheek lines, and a crack. Draw a short curved line inside each temple dip, following the outline. Under each eye socket, add a gentle curve that runs out to the cheekbone, showing where the bone sticks out. Under the cheekbone, the bone curves inward again — a second soft line there gives the cheek its hollow. For a finishing touch, add a small zigzag crack near the top of the cranium, a few short strokes. Tip: one crack is enough. Several start to look messy rather than old, and a crack that crosses the whole forehead splits the skull visually in half.
Step 10 — Draw the sutures and small details. Sutures are the joints between the bones of the skull, and they appear as thin zigzag lines. Draw one light zigzag across the top of the cranium and one short one on each side near the temples. Under each eye socket, add two tiny dots: these are the infraorbital foramina, the small holes where nerves and blood vessels pass through the bone. They are a small detail, but they are the detail that makes a drawing look studied rather than guessed. Tip: draw sutures very lightly. They are subtle in real life, and heavy zigzags turn a skull into a jigsaw puzzle.
Step 11 — Check the whole drawing before inking. Stop and look at the skull from arm’s length, then turn the paper upside down and look again. Upside down, your brain stops seeing “a skull” and starts seeing shapes, so mistakes jump out. Check five things: are the eye sockets the same size, is the nose centered on the vertical line, are the teeth rows even, is the jaw narrower than the cheekbones, and does the chin sit in the middle? Fix anything that fails before you ink, because ink cannot be erased. Tip: hold the paper up to a mirror. A mirror flips the drawing, and any lopsided feature shows up immediately.
Step 12 — Ink the lines and erase the guides. Go over every keeper line with your black fineliner: the outline, the jaw, the sockets, the nose, the teeth, the small detail lines, and the crack. Wait a minute for the ink to dry completely. After that, erase the circle, the center line, the eye line, and the jaw guide with a clean eraser, brushing the crumbs away instead of rubbing them across the paper. Tip: ink the teeth last, when your hand is warmed up. They are the fiddliest part of the drawing, and a wobbly first line there is the hardest to hide.Step 13 — Shade the big hollows. Fill the eye sockets, the nose cavity, and the gaps between the teeth with dark gray or soft black. Leave a thin sliver of paper white along the top edge of each eye socket — that sliver is the light catching the brow bone, and it is what makes the sockets look deep instead of flat. Shade the temples lightly and the hollows under the cheekbones a little darker. Tip: shade in small circles, not straight back-and-forth strokes. Circles blend into smooth tone; straight strokes leave stripes that read as scratches.
Step 14 — Shade the bone to make it round. A skull is a sphere on top of a box, and shading is what tells the eye that. Use the five-value scale in the next section: leave the top of the cranium almost white, use light gray on the forehead, mid gray on the sides of the cranium, dark gray under the cheekbones and along the jaw, and near-black only inside the sockets and nose. Blend each band into the next with a finger or a blending stump so there are no hard edges between values. Tip: press lightly with the beige or light gray first. Soft shading looks like bone; heavy shading looks like dirt, and you can always go darker but you cannot easily go lighter.
Step 15 — Color the skull and sign it. Color the bone cream, keep the teeth white, and shade the temples, the hollows under the cheekbones, and a thin band along the bottom of the jaw with beige. Fill the eye sockets, the nose, and the gaps between the teeth with dark gray. If you drew the optional marigolds, give them orange outer petals, yellow inner petals, brown centers, and green leaves. When the color is done, sign your name small in a bottom corner — every finished drawing deserves a signature. Tip: press lightly with the beige. Two light layers of color look like bone; one hard layer looks like a stain.
Shading Your Skull: The Five-Value Scale
Shading is the difference between a flat outline and a skull that looks like it could roll off the page. The rule is simple: decide where the light comes from, then give every surface one of five values. Most beginners use only two values — white paper and black pencil — and that is why their skulls look flat. Five values are enough to make bone look round.
| Value | Pencil and pressure | Where it goes on the skull |
|---|---|---|
| 1 — Paper white | No pencil at all | Top of the cranium, where the light hits first |
| 2 — Light gray | HB, very light pressure | Forehead, front of the cheekbones, top of the teeth |
| 3 — Mid gray | 2B, light pressure | Sides of the cranium, the jaw, the chin |
| 4 — Dark gray | 4B, medium pressure | Under the cheekbones, along the jaw, inside the temples |
| 5 — Near black | 6B, firm pressure | Inside the eye sockets, the nose cavity, between the teeth |
Pick one light direction and keep it for the whole drawing. Light from above is the easiest: the top of the cranium stays white, the shadows gather underneath the cheekbones and inside the hollows. Light from the side is more dramatic but harder, because every shadow has to fall the same way. Whichever you choose, check every shadow against it. A shadow on the wrong side is the fastest way to make a skull look broken.
Blend with a tissue, a cotton bud, or a blending stump — never with a bare finger if you can avoid it, because skin oil leaves shiny patches that catch the light. Blend each band into its neighbor, and then use a kneaded eraser to lift a thin highlight back along the brow bone and the top of the cheekbone. That lifted highlight is the single most realistic thing in the whole drawing.
How to Draw a Skull from the Side (5 Quick Steps)
Once the front view feels easy, the side view is a good second drawing. It uses the same circle, but the proportions change, and most guides skip it. Here is the short version.
Step 1 — Draw the circle, then stretch it. Draw the same cranium circle, then add a jaw that juts forward: the face of a skull in profile is not under the circle but in front of it. The chin sits roughly one third of a circle-width in front of the circle’s edge.
Step 2 — Place the eye socket. In profile there is only one socket, and it sits in the middle of the circle, slightly forward. Draw it as a large rounded shape, tilted so its outer edge sits lower than its inner edge.
Step 3 — Draw the nose and the teeth line. The nose hole in profile is a tall triangle pointing down and forward, sitting just in front of the socket. The teeth sit in a straight horizontal band below it, with the upper teeth hanging from the gum line and the lower teeth standing on the jaw.
Step 4 — Draw the jaw and the cheekbone. The cheekbone sweeps back from the nose toward the ear hole, which sits at the back of the circle, level with the socket. The jaw runs back from the chin to just below the ear, with the ramus — the upright part of the jawbone — rising behind the teeth. The gap between the ramus and the cheekbone is a hole you can see through.
Step 5 — Ink, erase, and shade. The same finishing order applies: ink the keeper lines, erase the guides, shade the socket and nose dark, and keep the cranium light. Side-view skulls shade best with the light coming from the front, which leaves the back of the cranium in soft shadow.
Why a Skull Drawing Starts Looking Odd
Almost every failed skull fails in one of eight ways, and each one has a one-line fix. Check your drawing against this table before you ink — fixing a mistake in pencil takes seconds, fixing it in ink means starting over.
| What looks wrong | Why it happened | The fix |
|---|---|---|
| Eye sockets placed too high | Measured from the circle, not the whole skull | Put the sockets on the halfway line of the whole skull, jaw included |
| Tiny sockets | Drew eyes, not sockets | Make them wide and dark — skull sockets are huge compared with eyes on a face |
| A pointy nose hole | Drew a plain triangle | Round the bottom into two small lobes, like an upside-down heart |
| No cheekbones | Drew a straight line from cranium to jaw | Let the outline dip at the temples and bulge at the cheeks |
| Teeth all the same width | Drew a row of equal rectangles | Narrow the side teeth a little so the row curves around the face |
| Jaw as wide as the cranium | Drew the jaw guide too wide | Keep the jaw narrower than the cheekbones; a wide jaw reads as a helmet |
| Lopsided face | Never checked against the center line | Measure each side against the vertical line after every step |
| Flat, lifeless skull | Only used white paper and black pencil | Shade with five values, darkest inside the sockets and nose |
The light-bulb shape deserves a special mention, because it is the most common failure of all. A skull that is a perfect circle with a small jaw underneath looks like a light bulb, and the cause is always the same: the outline ran straight from the cranium to the jaw without dipping at the temples or bulging at the cheekbones. The temples and the cheekbones are what make a skull look like a skull. If your outline is a smooth oval, stop and add the dip and the bulge before you draw anything else.
Fun Skull Variations to Try Next
The front-view skull you just drew is a base. Change three or four details and it becomes a completely different character. The table below lists the easiest variations, what to change, and what each one is good for.
| Variation | What to change | Best for |
|---|---|---|
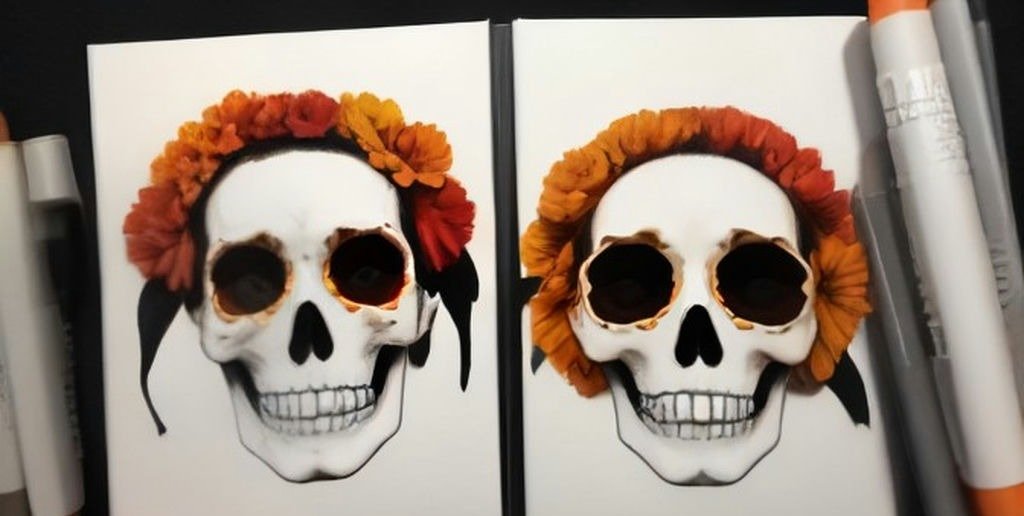
| Sugar skull | Add petals around the eye sockets, a small heart on the forehead, dots along the cheekbones, and flowers on the cranium | Day of the Dead, colorful posters |
| Pirate skull | Add a bandana over the cranium and two crossed bones behind the jaw | Halloween, party invitations, kids’ drawings |
| Cute skull | Make the sockets rounder and bigger, shrink the teeth to four per row, and skip the crack | Stickers, kids’ sketchbooks, kawaii art |
| Realistic skull | Use the Loomis thirds, draw the sutures, shade with all five values, and add the infraorbital foramina | Portfolios, anatomy study, portrait practice |
| Marigold skull | Add two marigold flowers beside the jaw, with scalloped petals and pointed leaves | Day of the Dead altars, October decorations |
| Robot skull | Replace the crack with panel lines, add a round bolt on each temple, and shade with hard edges | Sci-fi art, posters, tattoo flash |
For a sugar skull, keep the outline exactly as it is and decorate it: petals around the eye sockets, a small heart on the forehead, and dots along the cheekbones turn the same drawing into a Day of the Dead centerpiece. Marigolds are the traditional flower of the Day of the Dead, so a flower or two beside the jaw fits the theme. For a pirate version, only two additions are needed: a bandana over the cranium and two crossed bones behind the jaw. To give your skull a body, try a skeleton next — the same circle-and-guides method builds the ribcage and the spine.
Your 7-Day Skull Practice Plan
One skull teaches you the steps. Seven skulls teach you the proportions. This plan takes about 30 minutes a day, and by the end of the week you will be able to draw a skull from memory.
| Day | Practice | Goal |
|---|---|---|
| Day 1 | Draw the front-view skull following all 15 steps | Finish one complete skull, guides and all |
| Day 2 | Draw the same skull again, without looking at the guide | Remember the order: circle, eye line, jaw, sockets, nose, teeth |
| Day 3 | Draw three skulls, each in 10 minutes, timed | Speed without losing the proportions |
| Day 4 | Draw the side view, following the 5 quick steps | Learn how the jaw juts forward in profile |
| Day 5 | Draw a sugar skull and a pirate skull | Practice changing details on the same base |
| Day 6 | Draw a realistic skull with full five-value shading | Shade the cranium round and the sockets deep |
| Day 7 | Draw a skull from memory, then compare it with Day 1 | See how far the proportions have sunk in |
If a day’s drawing goes wrong, do not throw it away. Keep the bad ones in a folder and date them. In a month, that folder is the clearest proof of how fast you improved, and the mistakes in it are the exact things you fixed.
Frequently Asked Questions
What is the easiest way to draw a skull?
Start with a circle for the cranium and a jaw guide under it. Put the eye sockets on the halfway line of the whole skull, then add the nose, teeth, and jaw in that order. The order matters more than the talent: guides first, features second, shading last.
How many bones are in a human skull?
An adult skull has 22 bones. Eight form the cranium and fourteen form the face, and the lower jaw is the only one that can move. The bones are joined by zigzag seams called sutures.
Is drawing a skull okay for kids?
Yes. This version is round and friendly, with flowers instead of anything scary. Kids from about age seven can follow it, and younger ones can skip the teeth gaps and the crack. The sugar skull and cute skull variations are the best starting points for children.
How long does a skull drawing take?
About 20 minutes for the pencil steps and another 15 for inking and coloring, so 30 to 40 minutes in total. The teeth take the longest, and the shading takes the second longest. A timed practice skull can be done in 10 minutes once you know the steps.What pencil should I use to draw a skull?
An HB pencil for the light guide lines, a 2B for the outlines, and a 4B or 6B for the dark shading inside the sockets and nose. One pencil can do the whole drawing if that is all you have, but three pencils make the values much easier to control.
Why does my skull look like a light bulb?
Because the outline runs straight from the cranium to the jaw without dipping at the temples or bulging at the cheekbones. Add the temple dip just above the eye line and the cheekbone bulge just below it, and the light-bulb shape disappears.
Should the eye sockets be big or small?
Big. Skull sockets are huge compared with eyes on a living face, and small sockets are the fastest way to make a skull look like a cartoon. Each socket should be about as wide as the gap between the two sockets is half as wide, and the tops should sit on the brow line.
How do you draw skull teeth?
Hang the upper teeth from the gum line, starting with the two front teeth on the center line and adding three more on each side, each slightly narrower than the one before. Stand the lower teeth on the top edge of the jaw, lined up under the upper teeth, with a small gap between the rows for the closed mouth.
How do I shade a skull so it looks round?
Use five values: paper white on top of the cranium, light gray on the forehead, mid gray on the sides, dark gray under the cheekbones and jaw, and near-black only inside the sockets and nose. Blend each band into the next, and lift a thin highlight back along the brow bone with a kneaded eraser.
Can I draw a skull without any guide lines?
You can once you have drawn ten or twenty skulls, because the proportions become muscle memory. Until then, the guides are what keep the eyes level and the jaw centered. Even experienced artists block in a circle and a center line before they draw a skull — they just draw the guides so lightly that nobody sees them.
The Bottom Line
Learning how to draw a skull easy step by step comes down to three things: a big circle for the cranium, an eye line halfway down the whole skull, and a jaw that stays narrower than the cheekbones. Get those three right and the sockets, nose, teeth, and shading all have a place to go. The 15 steps in this guide take about 30 to 40 minutes, and the only supplies you need are a pencil, an eraser, and a sheet of paper.
Draw your first skull today, following every step in order, and keep it even if it is imperfect. Draw the second one tomorrow without the guide. By the seventh skull, you will be placing the eye line and the jaw guide from memory, and that is when the drawing stops feeling like a set of instructions and starts feeling like a skill. Put the finished skull on the fridge for October, or draw a second one with sugar skull patterns and see which one you like better.
